Monday, October 22, 2012

Oracle Webcenter Sites 11g Installations Part 2

Hello and Welcome to Installation of Oracle Webcenter sites 11g Part 2. I hope you have done first part of this tutorial successfully if not then you should do it fist http://technasir.blogspot.com/2012/10/oracle-webcenter-sites-11g.html

So Lets create a new domain for Webcenter sites

1) Run config.cmd from C:\Oracle\Middleware\wlserver_10.3\common\bin or your directory where you have installed Web logic server.

2) Click next from Welcome screen

3) Click next after verifying from above screen.

4) Enter a password and then click next

5) Click next without selection anyone of these.

6) Now your Domain has created successfully as shown in above snap.Click on Done. Let do some other configurations

7) Create a new folder name Oracle_WCS1 in Middleware directory as shown in below snap......


8) Go to C->Oracle->Middleware->wlserver10.3->common->bin
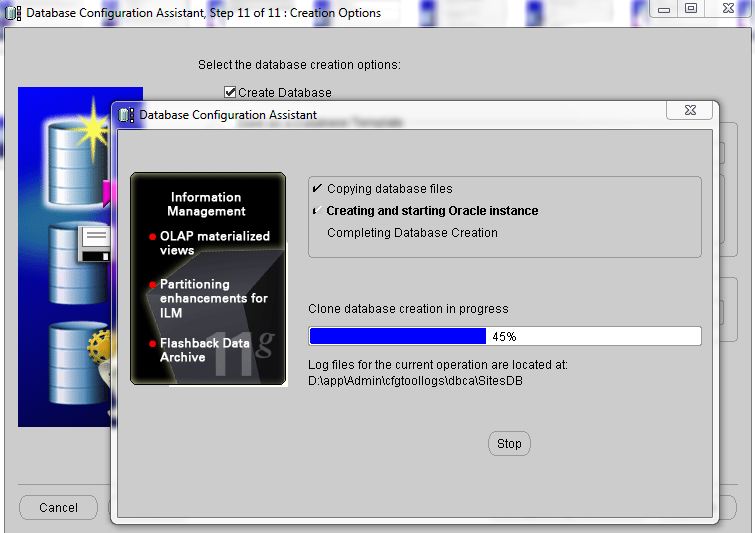
9)
10)
11)

Oracle Webcenter Sites 11g Installations Part 1

Hi, I am going to install Oracle Webcenter Sites 11g on Windows, I have not tested this on linux but I hope this will help in linux environment as well. Lot of People are facing the installation Problems. Due to lot of screenshots I will divide this installations post to three to four parts.

 The first part will show you to configuration and preparations of database schema for Webcenter sites.
I am installing this on Window 7.

1) From Start menu go to All Programs and find your database installation folder, expand it and from configuration and migration tools select Database configuration assistant.Here is Welcome screen.


2) click next from Welcome Screen

3) Click next with Create a database option selected.

4) Click next for default selection "General purpose or Transaction Processing"

5) Enter Database name for sites and click next

6) Look at the above snap and click next

7) Choose second choice for single password. Enter password two times. Enter a password that you should not forgot as i do sometimes :(

8) Look at the above snap and click next

9) Loot at the above snap and click next

10) Click Next

11) Now from Initializations parameters screen, Click on character sets and Do changes that i did. Look at the above snap.and click next.

12) Click next

13) Click next. Make sure create database is selected.

14) Click OK to close popup.

15) Installation Process......

16) Installation Process......

17) Installation process...

18) Don,t Worry Just Click OK to close Warning Popup.
 Now your Database Installation should complete successfully..........

Now its time to create new user for your database schema that you have just created. Open SQL developer to create user on that schema.
19) Open You SQL Developer and right click on connection and create new connection. Fill out this form as i did in below snap....... So in password enter your schema password that you have set in previous steps :). Click test to test connection. It should show success, click on connect to make connection.

20)
21)

Wednesday, September 5, 2012

Creating Custom Template for Oracle WebCenter Portal Problem

"the jspx document is not a valid page template or content presenter template. Recognizing the resource type as Page Style" 

I got this problem when I decided to created my on custom template for my portal application. But it is very simple issue. To resolve it
we need a "content" facet for our template and its reference. So open your template in source view and add

     "<facet>

          <description>Facet for content</description>
          <facet-name>content</facet-name>
        </facet>
    "
under    <af:xmlContent> tag.
Now add "<af:facetRef facetName="content"/>" in anywhere in your template source i.e after <af:xmlContent> closing tag.

your code may look like this.


       " <af:pageTemplateDef var="attrs">

    <af:xmlContent>
      <component xmlns="http://xmlns.oracle.com/adf/faces/rich/component">
        <display-name>MyTestTemplate</display-name>
        <facet>
          <description>Facet for content</description>
          <facet-name>content</facet-name>
        </facet>
      </component>
    </af:xmlContent>
    <af:facetRef facetName="content"/>
  </af:pageTemplateDef>"

Thursday, August 16, 2012

"This web page has a redirect loop" Problem Resolved


I was getting this error, i tried a lot to resolve it and at last i did it and
i decided to share so that in future if anybody get this error, he can use this
solution as well to resolve this problem.
before this my .htaccess file contain

<IfModule mod_rewrite.c>
RewriteEngine On
RewriteBase /
RewriteRule ^index\.php$ - [L]
RewriteCond %{REQUEST_FILENAME} !-f
RewriteCond %{REQUEST_FILENAME} !-d
RewriteRule . /index.php [L]
</IfModule>

# BEGIN WordPress
<IfModule mod_rewrite.c>
RewriteEngine On
RewriteBase /
RewriteRule ^index\.php$ - [L]
RewriteCond %{REQUEST_FILENAME} !-f
RewriteCond %{REQUEST_FILENAME} !-d
RewriteRule . /index.php [L]
</IfModule>
# END WordPress

RewriteEngine On
RewriteBase /
RewriteRule ^index\.php$ - [L]

# uploaded files
RewriteRule ^([_0-9a-zA-Z-]+/)?files/(.+) wp-includes/ms-files.php?file=$2 [L]

# add a trailing slash to /wp-admin
RewriteRule ^([_0-9a-zA-Z-]+/)?wp-admin$ $1wp-admin/ [R=301,L]

RewriteCond %{REQUEST_FILENAME} -f [OR]
RewriteCond %{REQUEST_FILENAME} -d
RewriteRule ^ - [L]
RewriteRule  ^[_0-9a-zA-Z-]+/(wp-(content|admin|includes).*) $1 [L]
RewriteRule  ^[_0-9a-zA-Z-]+/(.*\.php)$ $1 [L]
RewriteRule . index.php [L]
and that is why i am getting this error but after editing my .htaccess file to
this content and my problem resovled.
# END WordPress

RewriteEngine On
RewriteBase /
RewriteRule ^index\.php$ - [L]

# uploaded files
RewriteRule ^([_0-9a-zA-Z-]+/)?files/(.+) wp-includes/ms-files.php?file=$2 [L]

# add a trailing slash to /wp-admin
RewriteRule ^([_0-9a-zA-Z-]+/)?wp-admin$ $1wp-admin/ [R=301,L]

RewriteCond %{REQUEST_FILENAME} -f [OR]
RewriteCond %{REQUEST_FILENAME} -d
RewriteRule ^ - [L]
RewriteRule  ^[_0-9a-zA-Z-]+/(wp-(content|admin|includes).*) $1 [L]
RewriteRule  ^[_0-9a-zA-Z-]+/(.*\.php)$ $1 [L]
RewriteRule . index.php [L]
 This may help many of us and may be not all
of us.

Wednesday, August 1, 2012

Limit Post Character in WordPress


Sometime in WordPress we have a requirement that there should be only specific number of Character in our post and there should be read more link which should navigate to some other page. It is very important if you want to show only some lines of data on main page. You can use following code snippet to do this.
<?php
$post_excerpt= limit_post_characters(get_the_content(), get_permalink(),97, "&nbsp;&nbsp;Read more" ); echo $post_excerpt;
?>

Gravity form tabindex problem and short code

If we have single gravity form in our one page then their is not any type of index problem. So if we navigate through our fields then the cursor will go in that sequence in which it should go. But In case when you have multiple Forms on One page then you can face the problem of Tab in gravity form. But it has very simple solution to resolve this problem. You have to use tabindex in gravity form short code it will resolve your problem.

<?php echo do_shortcode('[gravityform id="2" title=false ajax=true tabindex=50]'); ?>

It means that this form Index will start from 50.  How to remove title from gravity form? it is very simple just use title=false as i have used above. If You want to use Ajax in You gravity form just use ajax=true in short code.

Show Custom field in WordPress Post, Custom Field in WordPress

Custom fields are very useful in WordPress and we can attach lot of information as metadata in our Post. Now we may have requirement in which we want to display these Meta data or Custom field in our Post. If you want to display the custom field data in your post or anywhere just use the following code snippet.

      <?php if(get_post_meta($post->ID, 'custom_field_name', true)!=null)
        {
             echo get_post_meta($post->ID, ' custom_field_name ', true);
              }
?>
If you feel any problem in this post just mention it in comment i will try to resolve it.

Show the Post thumbnail or Feature Image in Post WordPress

Post thumbnail or Feature image in WordPress post. In our many posts we use feature images and we also want that these images should also display in our post. To display the feature image or Post Thumbnail use the following code.

                          <?php if ( has_post_thumbnail()) :?>
     <?php the_post_thumbnail(); ?>
 <?php endif; ?>

If you will find any problem just mention it in comment i will try to resolve it.

Limit the Post Title in WordPress


Sometime we have very long post title and we want that only some part of title should display on main page and whole title should only display on single post page. Following code you can use to perform this task.
<?php
            foreach( $myposts as $post ):setup_postdata($post)

                          $post_title=get_the_title();
  $title_length=strlen($post_title);

  $title_sub=substr($post_title,0,29);
if($title_length<30)
the_title();
else
 echo $title_sub."...";
?>
If you will find any problem just mention it in comments, I will try to resolve it.

Simple Form Validation By jQuery, Inline Form validation jQuery


Lot of people want form validation by using jQuery. It is very simple to use jQuery and to perform inline form validation. Just follow the following
some steps to do this task.

 1) Create a form and some of fields
 <form id="buy-house" action="" method="post">
    <ul>
<li> <input type="text" name="First_Name" class="required" placeholder="First Name" /></li>
        <li> <input type="text" name="Last_Name" class="required" placeholder="Last Name" /></li>
        <li> <input type="text" name="Email_Address" class="required email" placeholder="Email Address"  /></li>
        <li> <input type="text" name="Telephone" class="required NumbersOnly" placeholder="Telephone" /></li>
</ul>
<input  type="submit" value="submit"  title="Submit" />
  </form>
  You have noticed that i have used class="required" in fields. basically it is a jquery class that are given in jquery libray that you will
  include in you file as i have mentioned below. you have to place class attribute in that fields which you want to validate otherwise just
  leave a field empty in which you do not want to use this.
 
  2) Now Just download and include the following jQurery libraries.
  <script type="text/javascript" src="jquery.validate.min.js"></script>
           <script type="text/javascript" src="jquery.validate.js"></script>


 3) Now just write the following code to your file head section.
<script>  
$(document).ready(function(){
    $("#buy-house").validate({
});
 });
</script>
now just save the file and run it. Now your form is validating on client side by using jQuery just test it. You have inline validation.

4) If you want to customize your error messages you can use message in you jQuery funtion as i did below.

<script>  
$(document).ready(function(){
    $("#buy-house").validate({
messages: {
      First_Name: { required: "*First Name Required" },
 Last_Name: { required: "*Last Name Required" },
 Email_Address:{ required: "*Email Required" },
 Telephone :{ required: "*Telephone Required" },

   }
      });
 });
</script>

5) Now If you want to style your errors just use .error class it will be included automatically in your jQuery error messages.
<style type="text/css">
.error {
color:red;
    font-weight:bold;
font-style:italic
}
</style>
if You still find any problem just mention it in comments i will try to resolve those.

Use jQuery or JavaScript in PHP, Hide or Show a DIV


How to use jQuery or JavaScript in PHP
Some time we have a such type of logic in which we want to use jQuery within PHP code. It is very useful and sometime you can perform
a very difficult task by using jQuery and PHP in no time. Here i am using jQuery/JavaScript code for showing and hiding of any div.
Basically here i am trying to show errors after validating a form on server side.

 if($first_name=="" || $first_name==null)
       {
     ?>
<script>
$(document).ready(function(){

        $(".contact2").hide();
$(".names2").show();
});
    </script>

<?php
  }
 elseif($last_name=="" || $last_name==null)
       {
    ?>
<script>
$(document).ready(function(){

        $(".contact2").hide();
$(".name2").show();
});
    </script>

<?php
       }


     elseif(!preg_match($email_exp,$enq_email))
{
         ?>
<script>
$(document).ready(function(){

        $(".contact2").hide();
$(".emails2").show();
});
    </script>
If you still find any problem just mention it in comment i will try to resolve it.

Use Image Instead of Radio Button Html forms


In one of my project I found a requirment of Images instead of radio button. I saw it first time and get confused and I started thinking
what should do and how can i implement it. At last thanks to javascript, Who made me enable to solve this problem. May be you can write a
better code than me but here I want to show how I have implemented it.

   <ul>
         <li>
   <label id="label1" for="developer1" onclick="change1()"><image id="111"src="image1.jpg" </label>
   <input id="developer1" style="display:none" type="radio" name="developer" value="1"  />
</li>
<li>
   <label for="developer2" onclick="change2()"><image id="222" src="image2.jpg" </label>
   <input id="developer2" style="display:none" type="radio" name="developer"  value="2" />
</li>
<li>
   <label for="developer3" onclick="change3()"><image id="333" src="image3.jpg" </label>
   <input id="developer3" style="display:none" type="radio" name="developer"  value="3" />
</li>

     </ul>

Here in label i have used three images names image1, image2 and image3 respectivly. Now for each of these image i have also make a border image.
so that when a person select and images a border image should replace its orignal image. May be you can do it in different way i.e throw css, javaScript
etc.

Following is my javaScript code. Please dont worry its very easy.

<script type="text/javascript">
imgs1=Array("image1.jpg","image1border.jpg");
imgs2=Array("image2.jpg","image2border.jpg");
imgs3=Array("image3.jpg","image3border.jpg");
var x=0;
var y=0;
var z=0;
function change1() {
document.getElementById("111").src=imgs1[++x];
document.getElementById("222").src=imgs2['0'];
document.getElementById("333").src=imgs3['0'];
if (x==1) {
x=0;
}
else
x=1;

}

function change2() {
document.getElementById("111").src=imgs1['0'];
document.getElementById("222").src=imgs2[++y];
document.getElementById("333").src=imgs3['0'];
if (y==1) {
y=0;
}
else
y=1;

}

function change3() {
document.getElementById("111").src=imgs1['0'];
document.getElementById("222").src=imgs2['0'];
document.getElementById("333").src=imgs3[++z];
if (z==1) {
z=0;
}
else
z=1;

}
</script>
If you want that by default one button should be selected just change the order of image in that array and put checked in that radio button.
If you are still confuse just write your problem in comment i will try to help you.

Tuesday, July 17, 2012

Continue Reading, Read More in WordPress Post

Some time when we have a lot of content in our WordPress Post, We want to display only minimum data on our main page and we redirect our user by a link like "Continue Reading.........", "Read More.......", "Read Full Story...." etc.

  So How we can make such type of links in our post. We can do it two ways, First when we write our Post there is insert more tag option as you can see in above picture.
But sometime a person forgot to add it manually, so how we can insert this tag automatically on every post of WordPress.
  In theme twenty elven of WordPress just go to indext.php file and just see this code

    <?php if ( have_posts() ) : ?>


<?php twentyeleven_content_nav( 'nav-above' ); ?>


<?php /* Start the Loop */ ?>
<?php while ( have_posts() ) : the_post(); ?>


<?php get_template_part( 'content', get_post_format() ); ?>


<?php endwhile; ?>

Now In Place of  <?php get_template_part( 'content', get_post_format() ); ?> just past this function <?php the_excerpt(); ?> and then see the behaviour and you will see the continue reading link.

Saturday, June 9, 2012

Increase LOV size in Oracle ADF JDeveloper

Some Time we need to increase the LOV (List of Values) Size in Oracle ADF form. So to Increase its size

1) Click On the LOV
2) Go To properties
3) Then go to "Content Style" Property
4) write "width:190px" in it and then save the Project.
5) Now the Size of LOV will Increase


Friday, June 8, 2012

Transient Attribute in Oracle ADF 11g

We Know That attributes in entity objects comes from underlying database tables. But some time we want an attribute for showing some results or multiplication or addition or something else for two attributes. But we have not any attribute in our database. So how we can perform this types of tasks.

We can use a Transient Attribute for this purpose. Transient Attribute has no link to database it just use to show some informations i.e total salary etc.We can use groovy and java language to assign values to this attribute.
  To create a Transient Attribute;
1) Go to Your entity Object and Open it.
2) Go to Attributes tab.
3) Click on Green Plus button and select "add new attribute"
4) Give the name of attribute and then from detail tab select "Transient" and then set its data types
accordingly.

Friday, May 18, 2012

Merging Table Column in Oracle ADF

Some time we require to merge two or more column in Oracle ADF table under one heading. I am posting because I need this solution to Implement in my project. So after solving this problem I decide to Post this solution for Oracle ADF developer.
Just Follow the following steps. Lets Suppose I want "delete" and "edit" operation under one heading name
"Operations"
1) In Your ADF table add a new column from Component Pallete.
2) Now Add a Delete Operation from your data control of that table and add it as commandtoolbarButton.
3) Now Right Click on This button go to surround it by toolbar.
4) Now add another commandToolbarButton from Component Pallete and also add it in your delete operation column, after this surround it by toolbar and then you got your required result.
Hope this will solve your problem